GitSwarm-EE 2017.1-1 Documentation
GitSwarm Pages
Note: This feature was introduced in GitSwarm 2016.1. Custom CNAMEs with TLS support were introduced in GitSwarm 2016.2.
Note: This document is about the user guide. To learn how to enable GitSwarm Pages across your GitSwarm instance, visit the administrator documentation.
With GitSwarm Pages you can host for free your static websites on GitSwarm. Combined with the power of GitLab CI and the help of GitLab Runner you can deploy static pages for your individual projects, your user or your group.
Read GitSwarm Pages on GitLab.com for specific information, if you are using GitLab.com to host yGitLab's website.
Table of Contents generated with DocToc
- Getting started with GitSwarm Pages
- Next steps
- GitSwarm Pages on GitLab.com
- Limitations
- Redirects in GitSwarm Pages
- Frequently Asked Questions
- Known issues
Getting started with GitSwarm Pages
Note: In the rest of this document we will assume that the general domain name that is used for GitSwarm Pages is
example.io.
In general there are two types of pages one might create:
- Pages per user (
username.example.io) or per group (groupname.example.io) - Pages per project (
username.example.io/projectnameorgroupname.example.io/projectname)
In GitSwarm, usernames and groupnames are unique and we often refer to them as namespaces. There can be only one namespace in a GitSwarm instance. Below you can see the connection between the type of GitSwarm Pages, what the project name that is created on GitSwarm looks like and the website URL it will be ultimately be served on.
| Type of GitSwarm Pages | The name of the project created in GitSwarm | Website URL |
|---|---|---|
| User pages | username.example.io |
http(s)://username.example.io |
| Group pages | groupname.example.io |
http(s)://groupname.example.io |
| Project pages owned by a user | projectname |
http(s)://username.example.io/projectname |
| Project pages owned by a group | projectname |
http(s)://groupname.example.io/projectname |
Warning: There are some known limitations regarding namespaces served under the general domain name and HTTPS. Make sure to read that section.
GitSwarm Pages requirements
In brief, this is what you need to upload yGitLab's website in GitSwarm Pages:
- Find out the general domain name that is used for GitSwarm Pages (ask your administrator). This is very important, so you should first make sure you get that right.
- Create a project
- Push a
.gitlab-ci.ymlfile in the root directory of your repository with a specific job namedpages - Set up a GitLab Runner to build yGitLab's website
Note: If shared runners are enabled by your GitSwarm administrator, you should be able to use them instead of bringing your own.
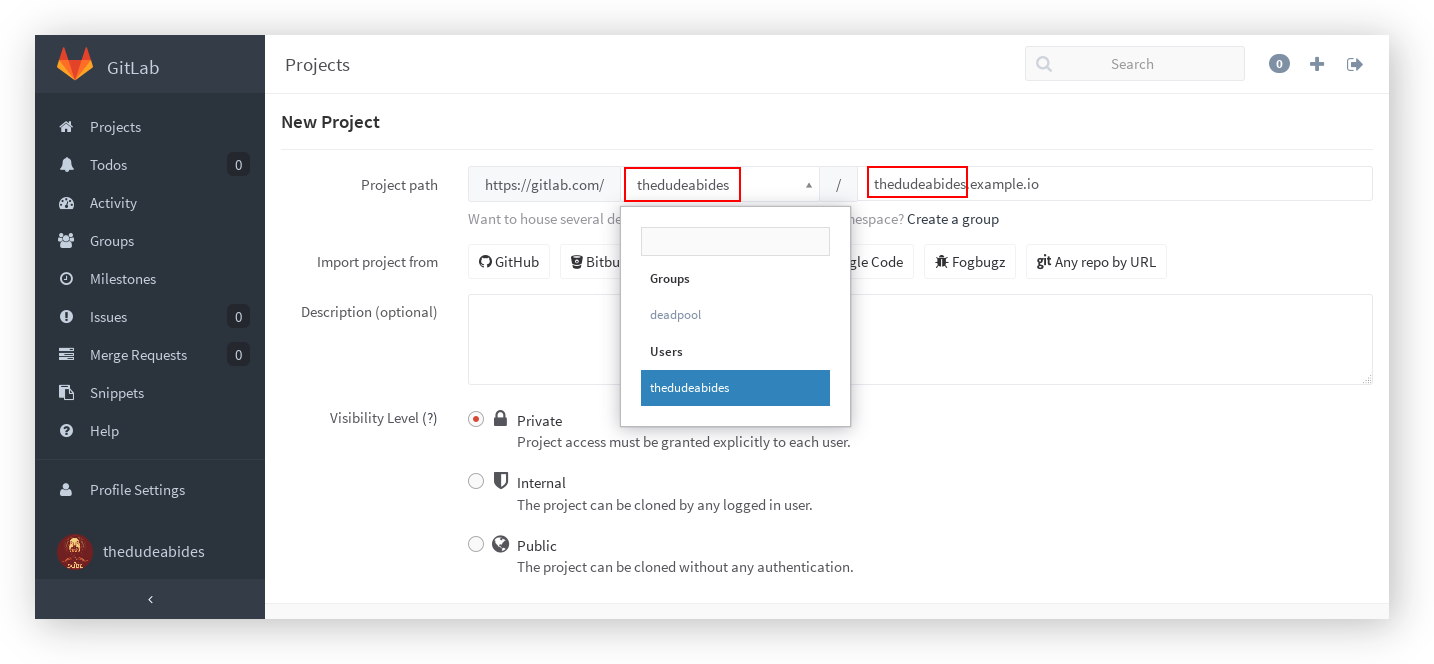
User or group Pages
For user and group pages, the name of the project should be specific to the username or groupname and the general domain name that is used for GitSwarm Pages. Head over your GitSwarm instance that supports GitSwarm Pages and create a repository named username.example.io, where username is your username on GitSwarm. If the first part of the project name doesn't match exactly your username, it won’t work, so make sure to get it right.
To create a group page, the steps are the same like when creating a website for users. Just make sure that you are creating the project within the group's namespace.
After you push some static content to your repository and GitLab Runner uploads the artifacts to GitLab CI, you will be able to access yGitLab's website under http(s)://username.example.io. Keep reading to find out how.
Note: If your username/groupname contains a dot, for example
foo.bar, you will not be able to use the wildcard domain HTTPS, read more at limitations.
Project Pages
GitSwarm Pages for projects can be created by both user and group accounts. The steps to create a project page for a user or a group are identical:
- Create a new project
- Push a
.gitlab-ci.ymlfile in the root directory of your repository with a specific job namedpages. - Set up a GitLab Runner to build yGitLab's website
A user's project will be served under http(s)://username.example.io/projectname whereas a group's project under http(s)://groupname.example.io/projectname.
Explore the contents of .gitlab-ci.yml
The key thing about GitSwarm EE Pages is the .gitlab-ci.yml file, something that gives you absolute control over the build process. You can actually watch your website being built live by following the CI build traces.
Note: Before reading this section, make sure you familiarize yourself with GitLab CI and the specific syntax of
.gitlab-ci.ymlby following our quick start guide.
To make use of GitSwarm Pages, the contents of .gitlab-ci.yml must follow the rules below:
- A special job named
pagesmust be defined - Any static content which will be served by GitSwarm Pages must be placed under a
public/directory artifactswith a path to thepublic/directory must be defined
In its simplest form, .gitlab-ci.yml looks like:
pages:
  script:
  - my_commands
  artifacts:
    paths:
    - public
When the Runner reaches to build the pages job, it executes whatever is defined in the script parameter and if the build completes with a non-zero exit status, it then uploads the public/ directory to GitSwarm Pages.
The public/ directory should contain all the static content of yGitLab's website. Depending on how you plan to publish yGitLab's website, the steps defined in the script parameter may differ.
Be aware that Pages are by default branch/tag agnostic and their deployment relies solely on what you specify in .gitlab-ci.yml. If you don't limit the pages job with the only parameter, whenever a new commit is pushed to whatever branch or tag, the Pages will be overwritten. In the example below, we limit the Pages to be deployed whenever a commit is pushed only on the master branch:
pages:
  script:
  - my_commands
  artifacts:
    paths:
    - public
  only:
  - master
We then tell the Runner to treat the public/ directory as artifacts and upload it to GitSwarm. And since all these parameters were all under a pages job, the contents of the public directory will be served by GitSwarm Pages.
How .gitlab-ci.yml looks like when the static content is in your repository
Supposedly your repository contained the following files:
├── index.html
├── css
│   └── main.css
└── js
    └── main.js
Then the .gitlab-ci.yml example below simply moves all files from the root directory of the project to the public/ directory. The .public workaround is so cp doesn't also copy public/ to itself in an infinite loop:
pages:
  script:
  - mkdir .public
  - cp -r * .public
  - mv .public public
  artifacts:
    paths:
    - public
  only:
  - master
How .gitlab-ci.yml looks like when using a static generator
In general, GitSwarm Pages support any kind of static site generator, since .gitlab-ci.yml can be configured to run any possible command.
In the root directory of your Git repository, place the source files of your favorite static generator. Then provide a .gitlab-ci.yml file which is specific to your static generator.
The example below, uses Jekyll to build the static site:
image: ruby:2.1             # the script will run in Ruby 2.1 using the Docker image ruby:2.1

pages:                      # the build job must be named pages
  script:
  - gem install jekyll      # we install jekyll
  - jekyll build -d public/ # we tell jekyll to build the site for us
  artifacts:
    paths:
    - public                # this is where the site will live and the Runner uploads it in GitSwarm
  only:
  - master                  # this script is only affecting the master branch
Here, we used the Docker executor and in the first line we specified the base image against which our builds will run.
You have to make sure that the generated static files are ultimately placed under the public directory, that's why in the script section we run the jekyll command that builds the website and puts all content in the public/ directory. Depending on the static generator of your choice, this command will differ. Search in the documentation of the static generator you will use if there is an option to explicitly set the output directory. If there is not such an option, you can always add one more line under script to rename the resulting directory in public/.
We then tell the Runner to treat the public/ directory as artifacts and upload it to GitSwarm.
See the jekyll example project to better understand how this works.
For a list of Pages projects, see the example projects to get you started.
How to set up GitSwarm Pages in a repository where there's also actual code
Remember that GitSwarm Pages are by default branch/tag agnostic and their deployment relies solely on what you specify in .gitlab-ci.yml. You can limit the pages job with the only parameter, whenever a new commit is pushed to a branch that will be used specifically for your pages.
That way, you can have your project's code in the master branch and use an orphan branch (let's name it pages) that will host your static generator site.
You can create a new empty branch like this:
git checkout --orphan pagesThe first commit made on this new branch will have no parents and it will be the root of a new history totally disconnected from all the other branches and commits. Push the source files of your static generator in the pages branch.
Below is a copy of .gitlab-ci.yml where the most significant line is the last one, specifying to execute everything in the pages branch:
image: ruby:2.1

pages:
  script:
  - gem install jekyll
  - jekyll build -d public/
  artifacts:
    paths:
    - public
  only:
  - pages
See an example that has different files in the master branch and the source files for Jekyll are in a pages branch which also includes .gitlab-ci.yml.
Next steps
So you have successfully deployed yGitLab's website, congratulations! Let's check what more you can do with GitSwarm Pages.
Example projects
Below is a list of example projects for GitSwarm Pages with a plain HTML website or various static site generators. Contributions are very welcome.
Visit the GitSwarm Pages group for a full list of example projects: https://gitlab.com/groups/pages.
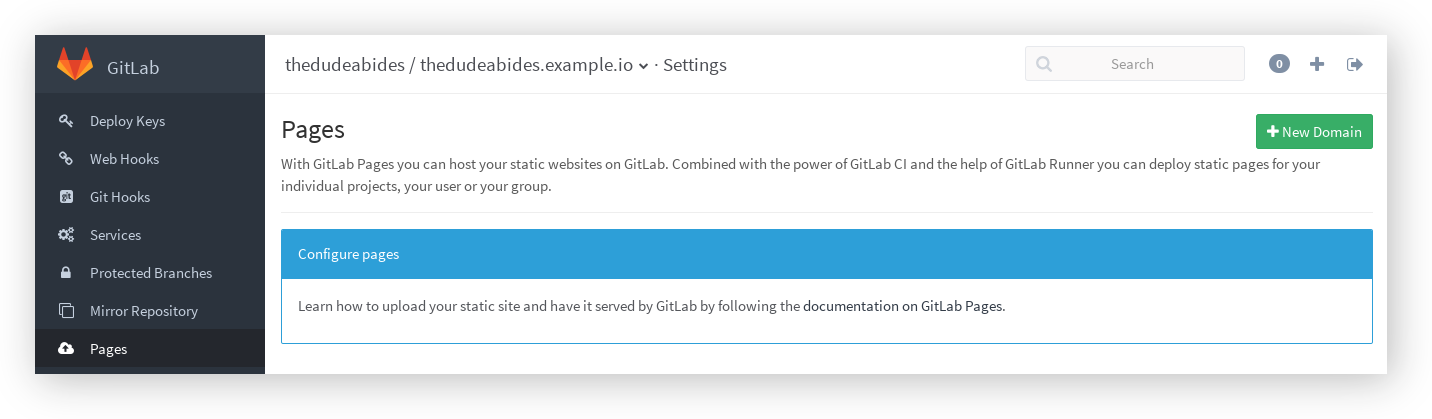
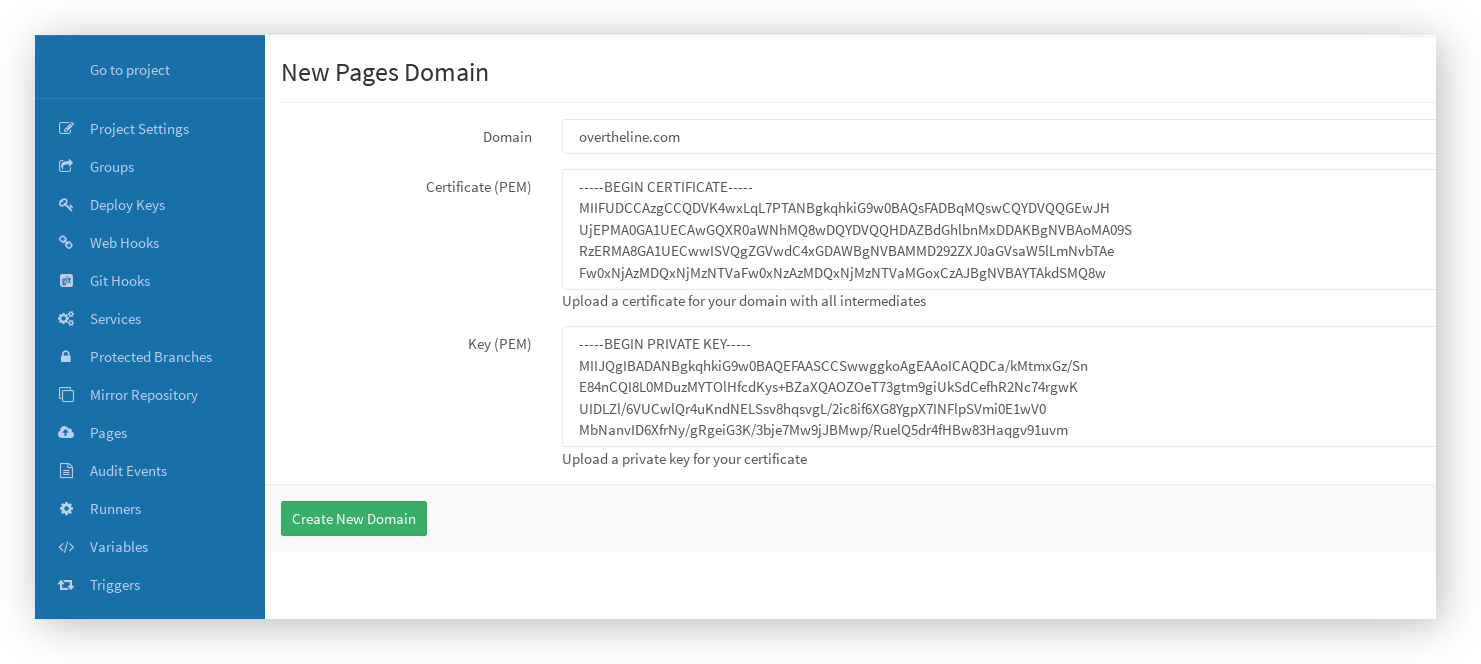
Add a custom domain to your Pages website
If this setting is enabled by your GitSwarm administrator, you should be able to see the New Domain button when visiting your project's Settings > Pages.
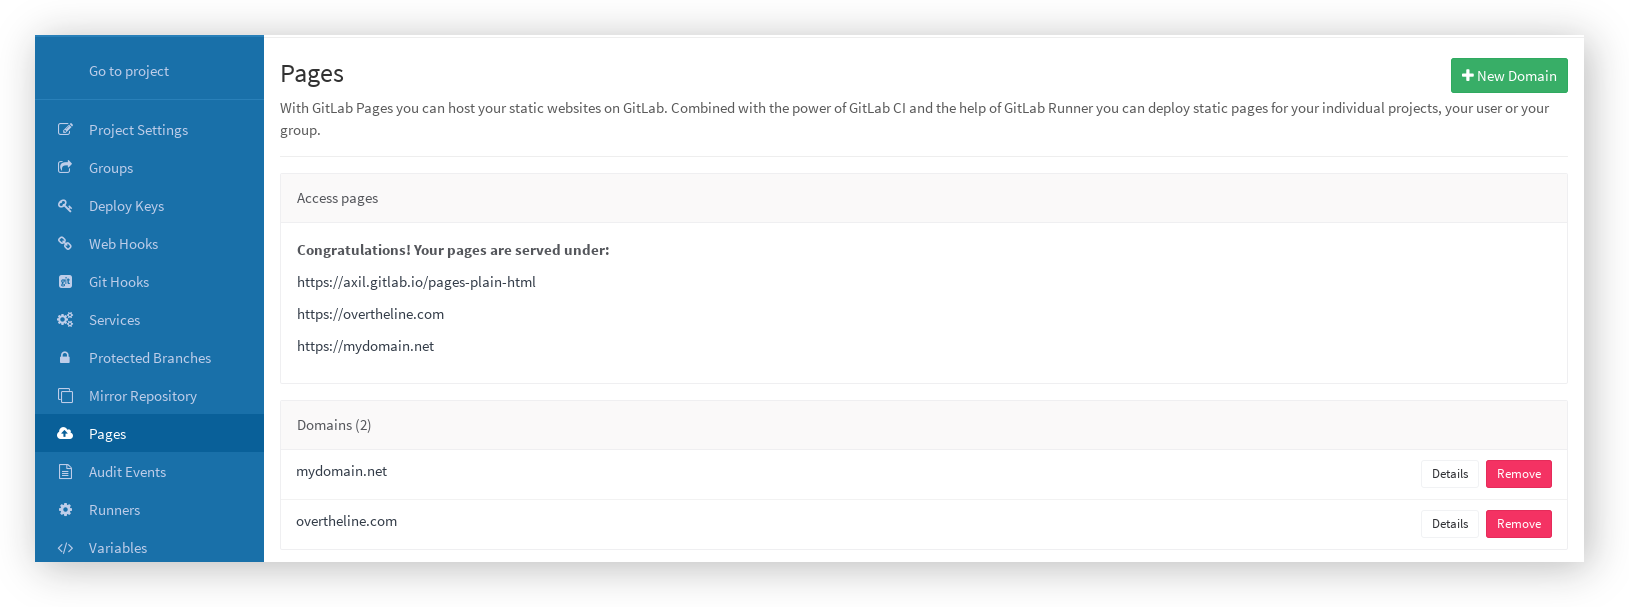
You can add multiple domains pointing to yGitLab's website hosted under GitSwarm. Once the domain is added, you can see it listed under the Domains section.
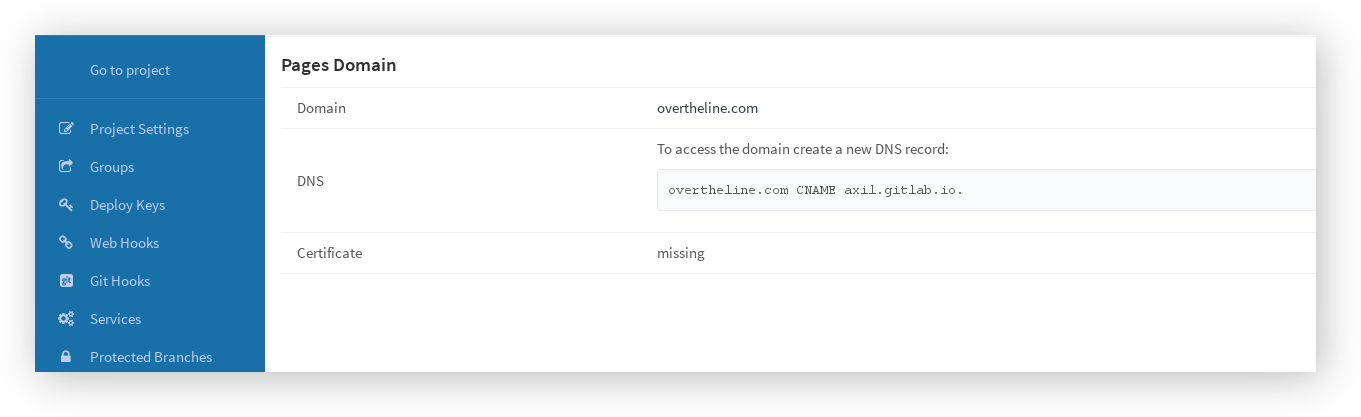
As a last step, you need to configure your DNS and add a CNAME pointing to your user/group page. Click on the Details button of a domain for further instructions.
Note: Currently there is support only for custom domains on per-project basis. That means that if you add a custom domain (
example.com) for your user website (username.example.io), a project that is served underusername.example.io/foo, will not be accessible underexample.com/foo.
Secure your custom domain website with TLS
When you add a new custom domain, you also have the chance to add a TLS certificate. If this setting is enabled by your GitSwarm administrator, you should be able to see the option to upload the public certificate and the private key when adding a new domain.
Custom error codes pages
You can provide your own 403 and 404 error pages by creating the 403.html and 404.html files respectively in the root directory of the public/ directory that will be included in the artifacts. Usually this is the root directory of your project, but that may differ depending on your static generator configuration.
If the case of 404.html, there are different scenarios. For example:
- If you use project Pages (served under
/projectname/) and try to access/projectname/non/exsiting_file, GitSwarm Pages will try to serve first/projectname/404.html, and then/404.html. - If you use user/group Pages (served under
/) and try to access/non/existing_fileGitSwarm Pages will try to serve/404.html. - If you use a custom domain and try to access
/non/existing_file, GitSwarm Pages will try to serve only/404.html.
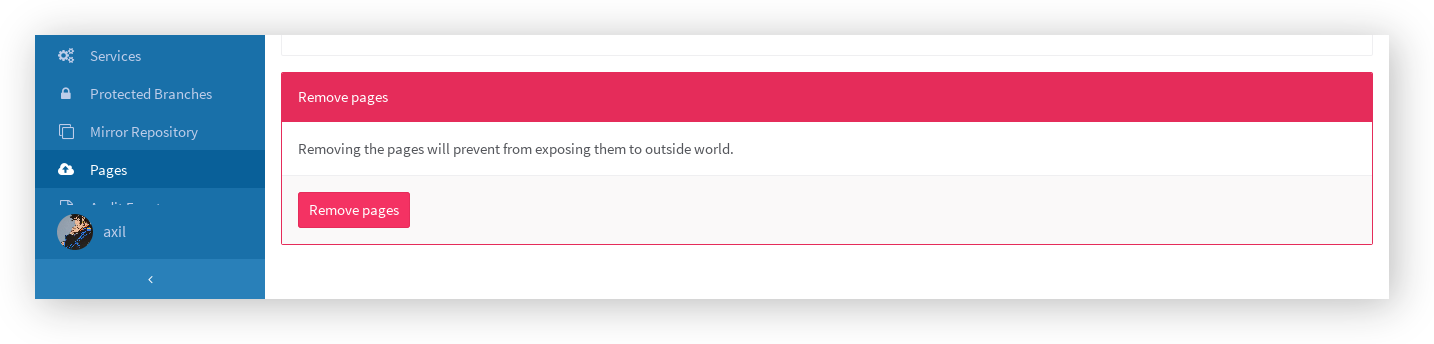
Remove the contents of your pages
If you ever feel the need to purge your Pages content, you can do so by going to your project's Settings > Pages and hit Remove pages. Simple as that.
GitSwarm Pages on GitLab.com
If you are using GitLab.com to host yGitLab's website, then:
- The general domain name for GitSwarm Pages on GitLab.com is
gitlab.io. - Custom domains and TLS support are enabled.
- Shared runners are enabled by default, provided for free and can be used to build yGitLab's website. If you want you can still bring your own Runner.
The rest of the guide still applies.
Limitations
When using Pages under the general domain of a GitSwarm instance (*.example.io), you cannot use HTTPS with sub-subdomains. That means that if your username/groupname contains a dot, for example foo.bar, the domain https://foo.bar.example.io will not work. This is a limitation of the HTTP Over TLS protocol. HTTP pages will continue to work provided you don't redirect HTTP to HTTPS.
Redirects in GitSwarm Pages
Since you cannot use any custom server configuration files, like .htaccess or any .conf file for that matter, if you want to redirect a web page to another location, you can use the HTTP meta refresh tag.
Some static site generators provide plugins for that functionality so that you don't have to create and edit HTML files manually. For example, Jekyll has the redirect-from plugin.
Frequently Asked Questions
Can I download my generated pages?
Sure. All you need to do is download the artifacts archive from the build page.
Can I use GitSwarm Pages if my project is private?
Yes. GitSwarm Pages don't care whether you set your project's visibility level to private, internal or public.
Do I need to create a user/group website before creating a project website?
No, you don't. You can create your project first and it will be accessed under http(s)://namespace.example.io/projectname.
Known issues
For a list of known issues, visit GitSwarm's public issue tracker.